
Back to blog
Mar 1, 2026
How to Create AI Anime Videos: A Step-by-Step Episode Guide
Learn how to create AI anime videos in MkAnime—from story and scripts to characters, storyboards, shot media, audio, and separate ZIP exports.
Mar 1, 2026
Learn how to create AI anime videos in MkAnime—from story and scripts to characters, storyboards, shot media, audio, and separate ZIP exports.
Plan the story, approve the cast, build the storyboard, and generate each shot without losing track of the episode.
By Sonya, Contributor to MkAnime · Originally published March 1, 2026 · Updated August 29, 2026
Disclosure: I contribute to MkAnime, the product shown in this guide. AI assistance was used to organize and edit the article. The workflow, settings, and screenshots were checked against the current MkAnime implementation and interface on August 29, 2026.
To create AI anime videos in MkAnime, start with a project brief. Then review one episode's story, script, characters, scenes, and storyboard in order. Generate keyframes, video clips, and dialogue audio shot by shot. Finally, export those media files as separate ZIPs and assemble the finished episode in your video editor.
That order matters. A weak story decision is cheap to fix as text. It becomes expensive after it has spread across ten images and ten video clips.
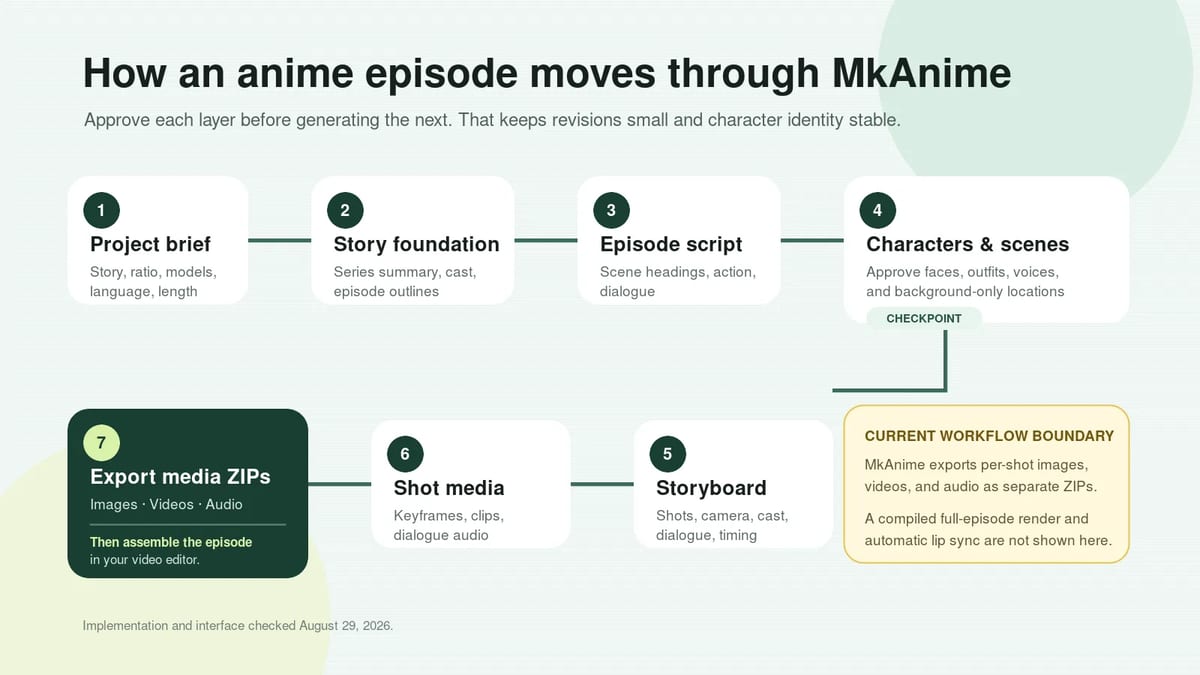
Approve each layer before generating the next. The current workspace exports images, videos, and audio separately.
An anime episode moves through seven layers:
| Layer | What you decide | What comes next |
|---|---|---|
| 1. Project brief | premise, format, style, language, length | project story and episode outlines |
| 2. Story foundation | summary, characters, episode purpose | one episode script |
| 3. Script | scenes, action, dialogue | reusable characters and locations |
| 4. Characters and scenes | identity, outfit, voice, environment | a shot-by-shot storyboard |
| 5. Storyboard | framing, cast, location, dialogue, timing | first frames and motion prompts |
| 6. Shot media | images, clips, dialogue audio | files ready for export |
| 7. Export | image, video, and audio ZIPs | final edit outside the project workspace |
If your deliverable can stand on its own, decide whether you need a project or one focused tool before setting up all seven layers. If you are making a title sequence rather than an episode, the same layers apply; the anime opening guide shows how to plan the beats around a song and a title card.
You can open the AI anime video generator when you are ready to build a project. Keep this guide beside the workspace and review each checkpoint before moving forward.
Open My Works, select New Project, and write a name plus a story description.
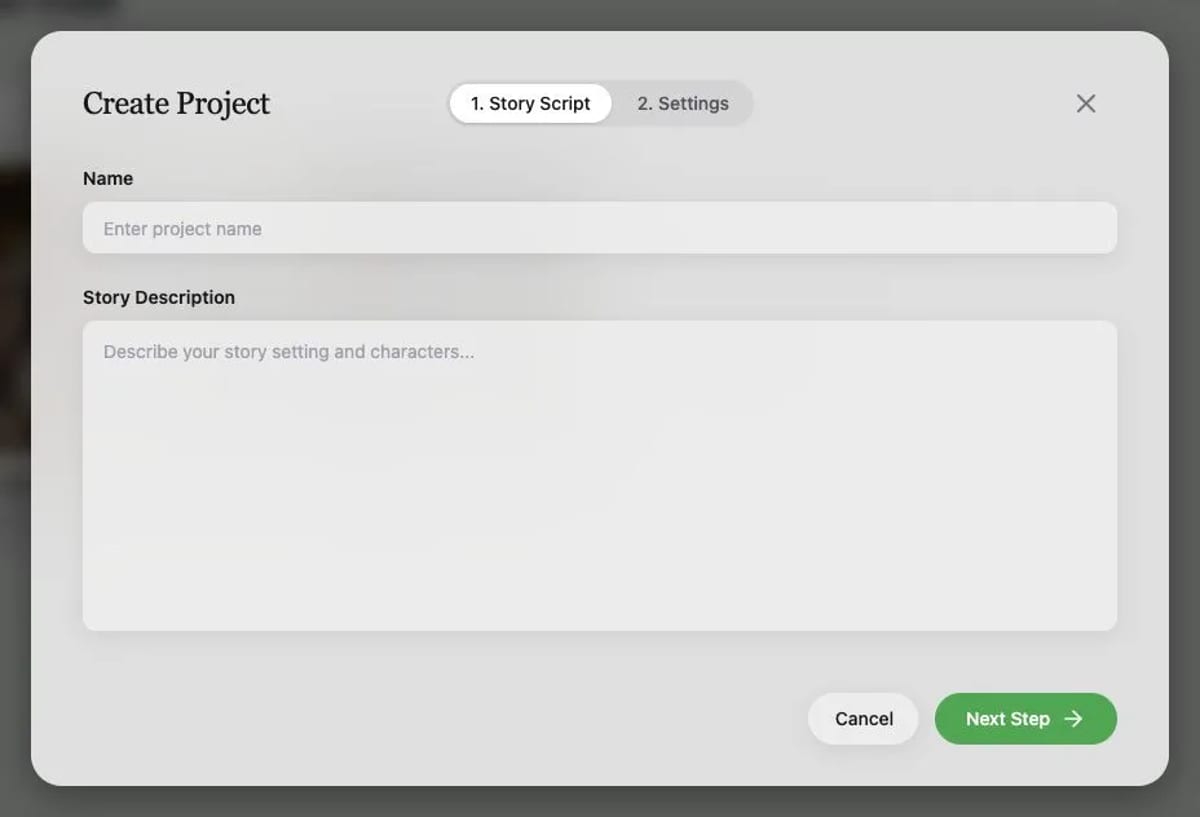
Start with a premise that names the protagonist, goal, obstacle, setting, and ending beat.
Your description does not need to be a finished script. It needs enough structure to answer five questions:
Use this template:
[PROTAGONIST] must [GOAL] before [DEADLINE].
The story takes place in [SETTING].
[OBSTACLE OR RIVAL] makes the goal difficult.
The episode should feel [MOOD AND VISUAL DIRECTION].
End when [VISIBLE CHANGE OR REVEAL].
Example:
A rookie courier must cross a flooded neon city before sunrise.
She carries a message that could stop a district evacuation.
Her former partner follows her, unsure whether to help or take the message.
Use a tense, rain-soaked science-fiction anime look with quiet dialogue.
End when the partner opens the final bridge instead of blocking it.
This prompt gives the system a character, goal, pressure, setting, tone, and ending. It also gives you a simple test for every later scene: does this beat help the courier reach the bridge?
The project settings currently include:
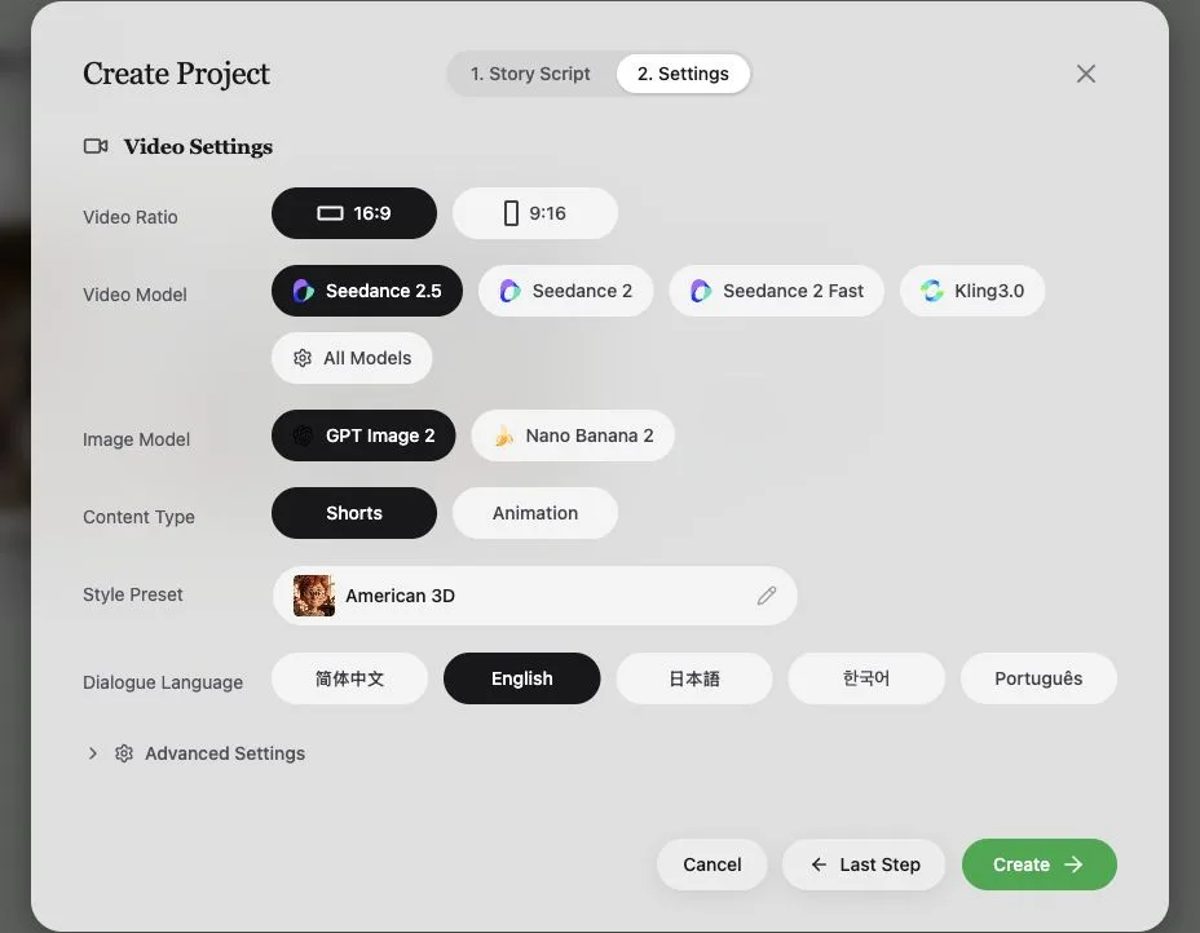
Choose the final viewing format before the storyboard is composed.
Use 16:9 for a landscape episode, presentation, or YouTube video. Use 9:16 when the project is designed for Shorts, Reels, or TikTok. Changing the ratio later can break close-ups, group shots, and negative space.
Choose Animation when you need more than one episode. The advanced settings add episode count, story rhythm, and episode length.
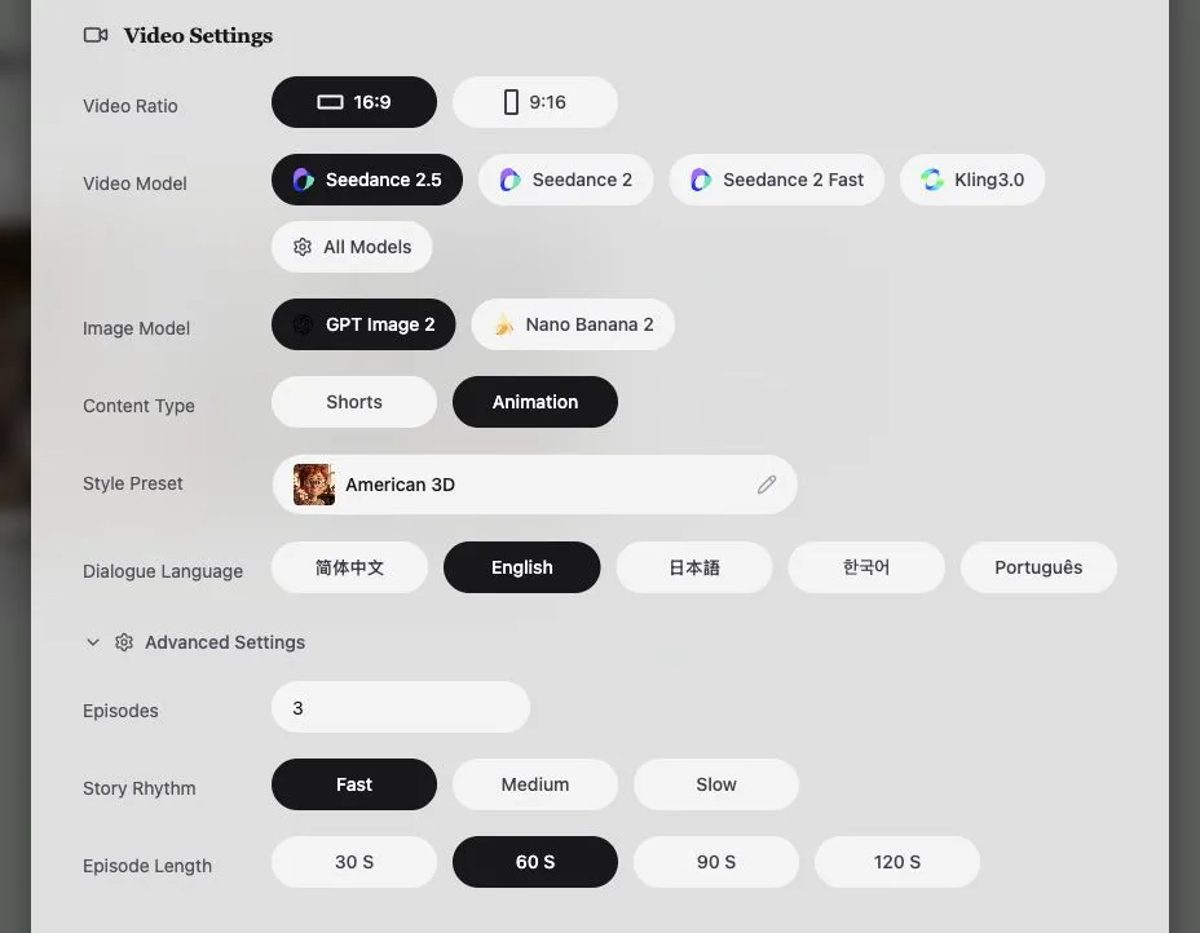
Animation projects add episode count, story rhythm, and 30-, 60-, 90-, or 120-second episode lengths.
Start small. A 30- or 60-second episode is easier to review than a long sequence with many locations and costume changes.
After project creation, MkAnime initializes the story foundation. The current flow creates a project description, extracts characters, starts character-image tasks, and generates episode outlines.
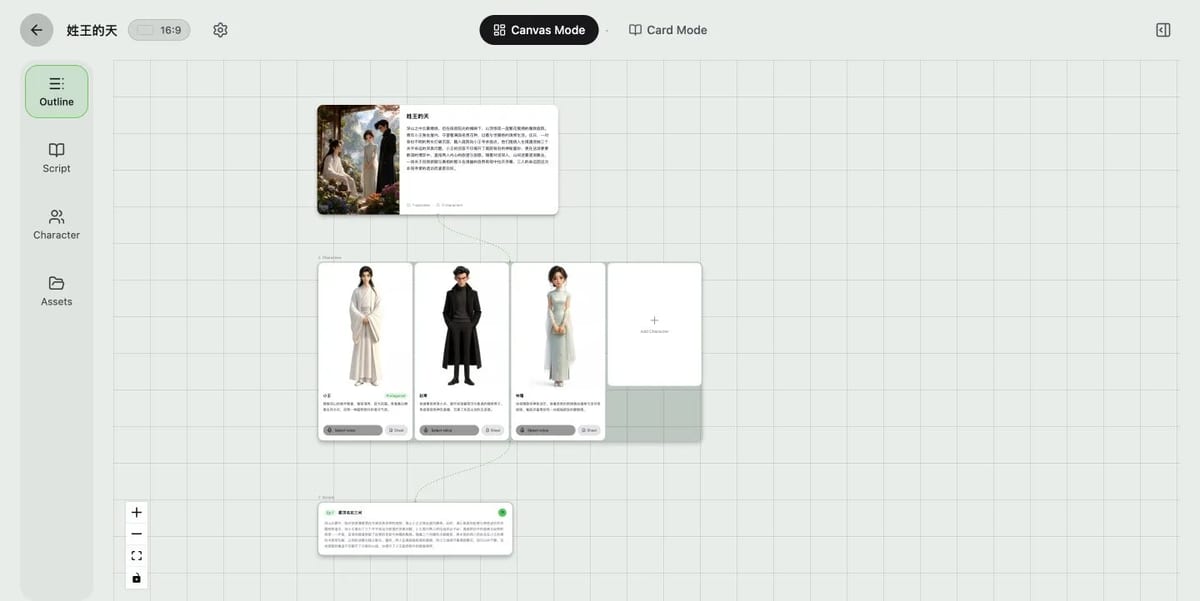
The outline canvas keeps the project summary, recurring cast, and episode cards in one view.
Do not treat this stage as a formality. Check three things.
An episode should introduce, complicate, or resolve a clear problem. If the outline tries to introduce the world, explain every character, stage a fight, and end a romance in one minute, narrow it.
Character descriptions should cover more than clothing. Add what the person wants, what they fear, and how they behave under pressure. Those choices improve both dialogue and shot design.
Replace broad labels such as “city” or “forest” with usable production details: time of day, weather, architecture, dominant colors, and one memorable object.
If you came here looking for an AI anime series creator or an anime episode maker, this is the stage that decides whether the series holds together. A one-off short and a multi-episode series start from the same project, but they need different inputs.
Pick the content type and episode count deliberately. A Shorts project is always one episode. An Animation project starts with three episodes by default, and the Episodes field accepts any whole number from one upward. Three is a sensible first season to test: long enough to show a setup, a complication, and a payoff, short enough to review every outline in one sitting. You can add or delete episodes later from the outline view.
Write the premise as a season, not a scene. The episode outline writer reads your original story description first and treats it as the source of truth. How closely the outlines follow you depends on how much you give it:
In both cases the writer is told not to invent core characters, relationships, key events, or endings that conflict with your description. So if you already know how the season ends, say it. If you write "episode 2 ends with the rival stealing the map," the outline has to keep that beat.
Read each outline as its own episode. Every episode summary is written as a complete arc: an opening, a middle conflict, and an outcome. Check that each one changes something for the main character, and that episode 3 could not be swapped with episode 1 without breaking the story.
Revise one episode without touching the others. In the project chat you can ask for a single change, such as "rewrite episode 2's outline so the rival appears in the first scene." Only that episode's summary is replaced. Asking to rewrite all episode outlines redrafts the whole set, which is useful after you change the premise but also overwrites edits you liked.
Let the cast carry across episodes. Characters are extracted once at the project level, not per episode, so the same character records and reference images are available when you script and storyboard episode 2 and episode 3. Approve the cast before you script the first episode; fixing a face after three episodes of shots costs far more than fixing a description now.
The other project settings — aspect ratio, video model, style preset, and dialogue language — also apply to every episode, which is another reason to settle them before the first script.
Once the project summary, cast, and episode purpose agree, open the first episode.
The episode script contains scene headings, action, and dialogue. MkAnime keeps this text editable, so this is the best time to fix story logic.
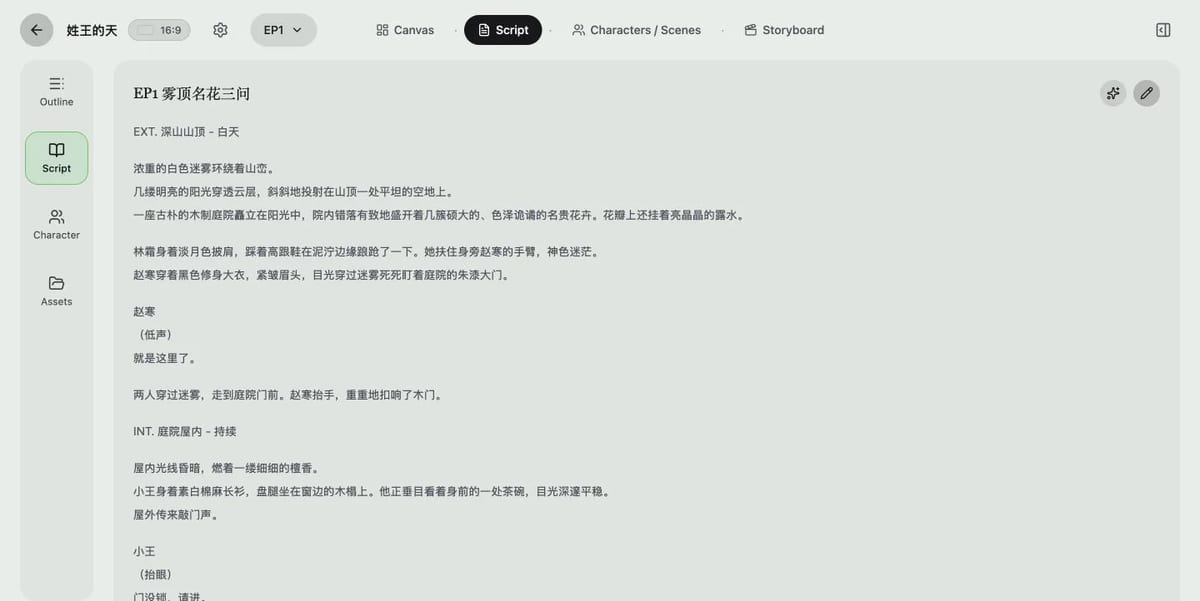
Edit the story while the main cost is still words, not regenerated media.
The current script planner uses these scene-count ranges:
| Episode length | Typical scene range |
|---|---|
| 30 seconds | 3–4 scenes |
| 60 seconds | 5–7 scenes |
| 90 seconds | 8–10 scenes |
| 120 seconds | 10–12 scenes |
These are planning defaults. A quiet exchange may use fewer scenes. A fast montage may use more.
Read the script once without looking at the images. For every scene, ask:
If nothing changes, combine the scene with a neighboring beat.
For a deeper method, use the script-to-storyboard workflow. It explains how to turn story beats into shots that can be checked before motion begins.
Next, open Characters / Scenes. The workspace groups reusable character cards and location assets for the selected episode.
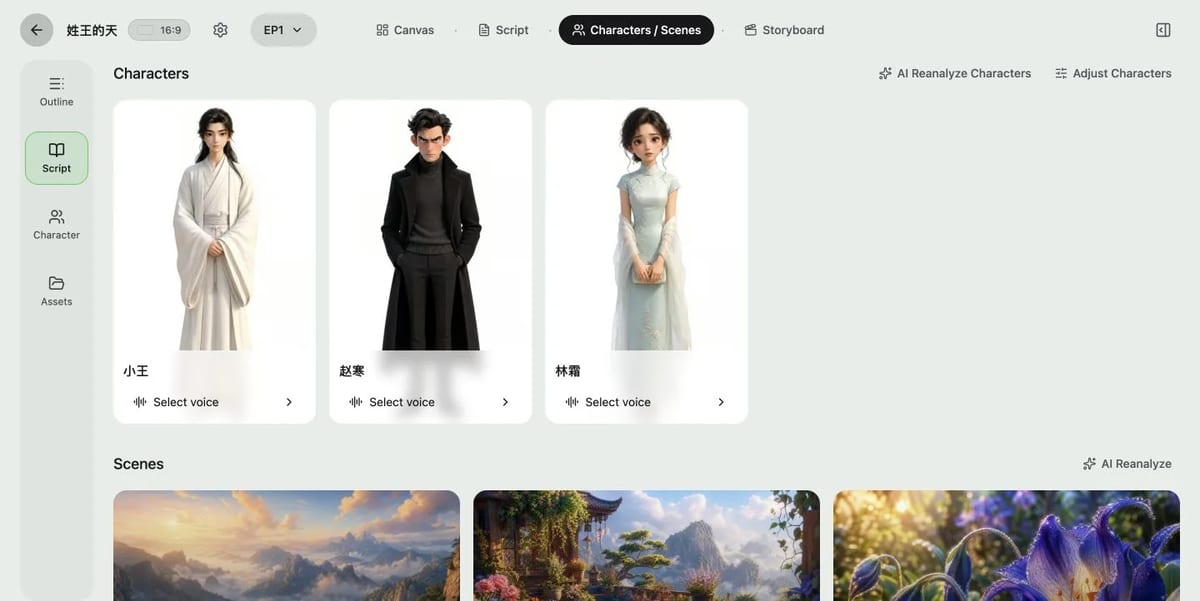
Approve recurring characters and locations before storyboarding.
For every recurring character, record the traits that should stay stable:
The goal is recognizable identity. Small changes in expression, pose, light, and camera angle are expected. For a stricter review process, follow the guide to consistent AI anime characters.
You can also build a more deliberate reference with the anime character creator.
Scene prompts should describe the location without placing the cast inside it. Include:
This separation makes the same location easier to reuse with different characters and compositions.
The storyboard converts the script into a sequence of individual shots. Each card can contain a description, dialogue, scene reference, character reference, first frame, optional last frame, and video.
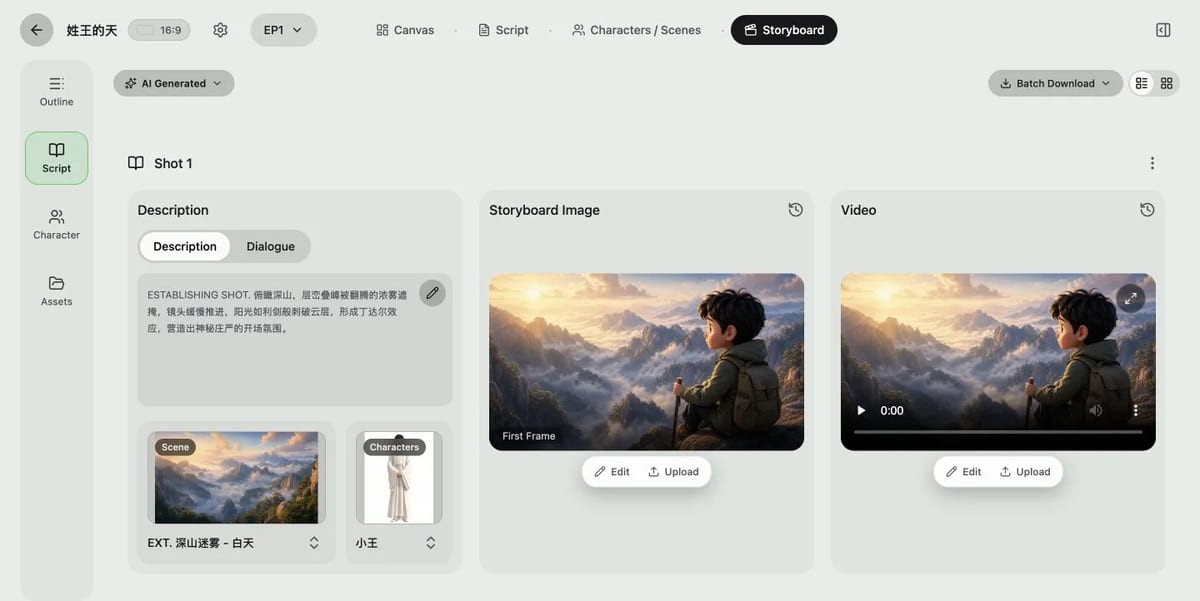
Each shot connects a narrative purpose to reusable references and generated media.
A useful storyboard mixes four basic jobs:
Write the purpose in plain language before polishing the camera description. “Reveal the empty bridge” is more useful than “cinematic wide shot” because it explains what the shot must communicate.
The current storyboard planner uses different default clip lengths by model:
| Video model | Default clip length used for planning |
|---|---|
| Seedance 2.5 | 30 seconds |
| Seedance 2 | 15 seconds |
| Seedance 2 Fast | 15 seconds |
| Kling3.0 | 15 seconds |
For a 60-second episode, that means the planner may begin with two Seedance 2.5 shots or four 15-second shots. You can still insert, duplicate, move, or delete shots when the story needs a different rhythm.
Review the full shot list before generating media. Check screen direction, character order, time of day, props, and the final frame of one shot against the first frame of the next.
Once the board is stable, create media in three layers.
The first frame establishes composition, identity, lighting, and the starting pose. If it is wrong, fix it before asking a video model to animate it.
Use a last frame for a door that must end open, a character who must reach a marked position, or a reveal that must finish on a specific composition. Skip it when the shot only needs subtle ambient motion.
A practical motion prompt covers five parts:
CAMERA: [one clear move]
SUBJECT: [one main action]
ENVIRONMENT: [one or two small responses]
PACING: [steady, hesitant, sudden, held]
END: [final pose, position, framing, and brief hold]
Example:
CAMERA: Slow tracking move beside the courier.
SUBJECT: She runs through ankle-deep water and grips the message case.
ENVIRONMENT: Rain moves diagonally; neon signs reflect across the water.
PACING: Controlled urgency, no sudden camera shake.
END: She stops at the sealed bridge gate and looks up. Hold for half a second.
The anime image-to-video prompt guide has more templates for camera, subject, atmosphere, and end states. The storyboard image-to-video workflow covers timing and continuity across several shots.
The AI Generated menu can start all storyboard images, videos, or audio.
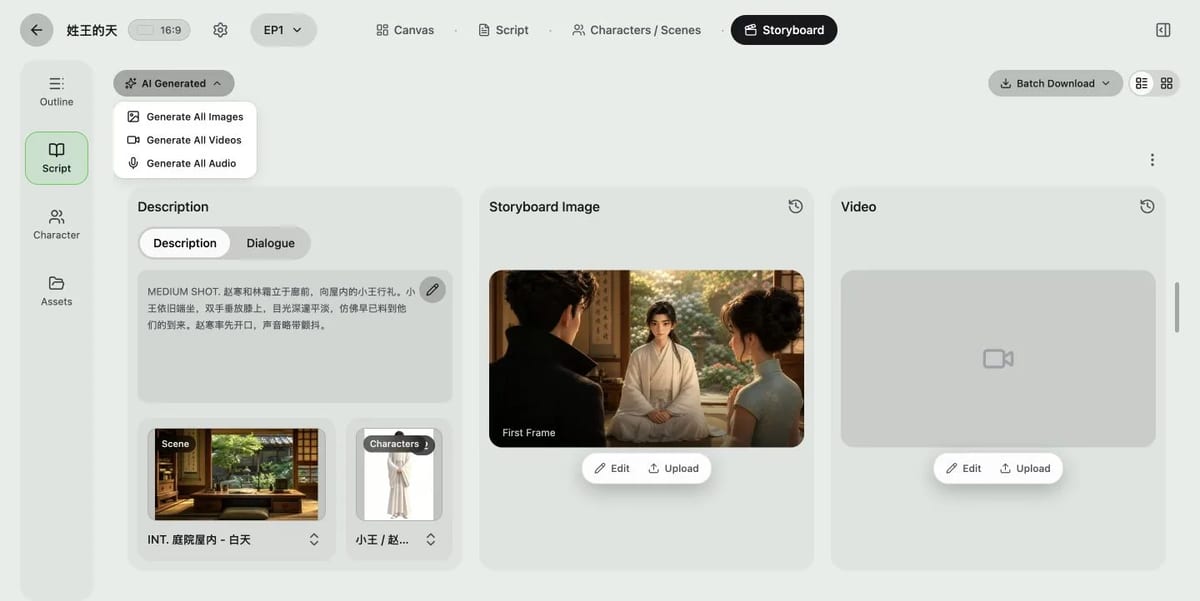
Batch actions are useful after the storyboard and references have been approved.
Run a small test first. Generate one identity-heavy close-up, one wider action shot, and one environment shot. If those three agree, the board is ready for broader generation.
When one result fails, edit that shot. Keep the approved shots and their history intact.
Assign a voice to each speaking character before generating dialogue audio. The storyboard can then create audio for individual dialogue lines or start a batch audio run.
Review pronunciation, pacing, emotion, and speaker assignment. A line that reads well may still be too long for its shot. Shorten the line or extend the visual beat before generating the rest of the episode.
The current Batch Download menu exports available images, videos, and audio as separate ZIP files.
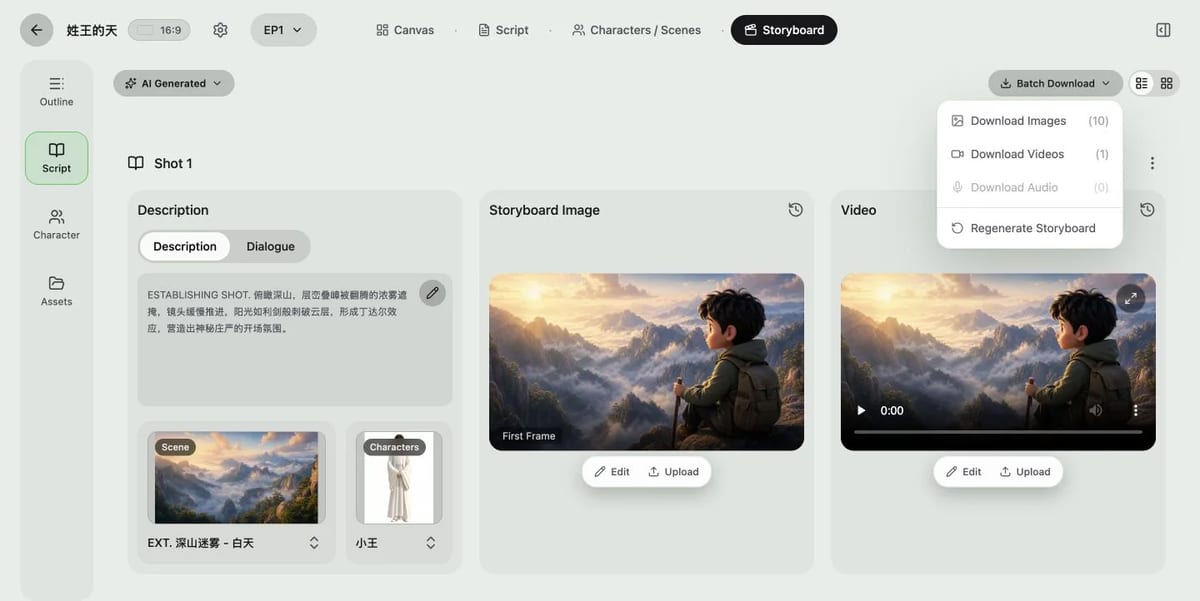
The inspected workspace exports media categories separately. It does not show a compiled full-episode download.
Bring those files into your video editor to:
This boundary is important. MkAnime helps you plan and generate the episode assets in one project. The current project workflow does not automatically assemble a finished episode or apply automatic lip sync.
| Problem | Check first | Smallest useful fix |
|---|---|---|
| The story feels rushed | episode outline and script | remove one subplot or combine two scenes |
| The character drifts | character card and first frame | simplify motion and restore stable identity traits |
| The location changes | scene asset and shot assignment | reuse one approved environment description |
| The motion feels random | video motion prompt | keep one camera move and one main action |
| The cut feels abrupt | end state and next first frame | match direction, subject position, or lighting |
| Dialogue audio is missing | character voice assignment | select a voice before generating the line |
| Too many assets need revision | storyboard approval | stop batch generation and fix the board first |
MkAnime can generate the story foundation, episode script, character and scene assets, storyboard, keyframes, clips, and dialogue audio. You still need to review those layers. In the workflow checked for this guide, the final media categories are downloaded separately and assembled in an external editor.
The current script planner uses 3–4 scenes for 30 seconds, 5–7 for 60 seconds, 8–10 for 90 seconds, and 10–12 for 120 seconds. Treat these as starting ranges. The story may need fewer or more.
Choose 16:9 for landscape viewing and 9:16 for vertical feeds. Decide before generating images so composition, close-ups, and group shots are designed for the final frame.
The inspected project workflow generates dialogue audio, but it does not show automatic lip sync as part of episode assembly. Plan to handle mouth timing during final editing or use a separate, verified dubbing workflow.
Yes. Choose Animation as the content type and set the episode count (three by default). MkAnime writes one outline per episode from your story description and keeps the cast at the project level, so every episode reuses the same characters. Each episode still gets its own script, storyboard, and generated shots, so produce and review them one at a time.
Generate three test shots: a close-up, an action shot, and an environment shot. They reveal identity, motion, and world-consistency problems before a batch run creates many assets.
Your first goal is a reviewable episode pipeline: a clear brief, a focused script, approved references, a coherent storyboard, and a small set of usable shots.
Once that structure works, reuse it. Keep the same character records, scene assets, review questions, and export checklist for the next episode. That is how a single AI anime video becomes a repeatable series workflow.
Start a project with the MkAnime AI anime video generator, and keep the first episode short enough to review carefully.
From inspiration to complete plot, quickly output chapter structure