A manga storyboard (often called a "name" in Japanese manga production) is the rough plan of a chapter: which moments get a panel, how big each panel is, and where the page turns fall. It comes before any finished art.
An AI storyboard generator can take a plot or a short synopsis and draft that plan for you: a list of shots with framing, action, dialogue, and a rough image for each one. It will not decide your page layout or letter the pages. Those choices stay with you, and they are what make a sequence read like manga instead of a slideshow.
This guide walks through the full path from plot to pages: writing a plot that can be boarded, breaking it into panel beats, planning the pages, generating the storyboard in MkAnime, and turning the shots into manga panels.
Manga storyboards are planned by page, not by seconds
A video storyboard is timed: each shot lasts a number of seconds, and the cuts set the pace. If that is what you need, the script to anime storyboard guide covers the screen workflow.
A manga storyboard is read, so the page does the timing:
- Panel size is time. A large panel slows the reader down. A row of small panels speeds them up.
- The page turn is the strongest cut. A reveal works best right after the reader turns the page, not halfway down a page they can already see.
- Silent panels are pauses. A panel with no dialogue gives the reader a beat to feel the moment.
- Reading order is fixed. Japanese manga reads right to left, top to bottom. Western comics read left to right. Vertical webtoons scroll top to bottom.
Keep these four rules in mind when you turn the AI output into pages. The generator gives you the shots; you decide how big they are and where they land.
Start with one scene or one short chapter, written as three to six sentences of things a reader can see. Feelings need a visible action, an expression, or a line of dialogue.
Example plot
Rin, a delivery girl in a rainy port town, drops a sealed letter in a puddle. While drying it under a shop awning, she sees that the address is her own house, written in her late grandmother's handwriting. She runs home through the rain. At the door, her younger brother is holding an identical letter.
This plot has a character, a place, an object, a discovery, a chase, and a final reveal. Each of those can become one or more panels.
Before you generate, name your characters and give each one a short, fixed description: age, hair, outfit, and one signature item. You will reuse those words later.
A panel beat is one moment that changes something: an action, a piece of information, or an emotion. Write them as a numbered list before you touch any tool.
| Beat | What the reader sees | Framing | Text |
|---|
| 1 | Rainy port street, Rin on her bike | Wide | Caption: place and time |
| 2 | The letter slips into a puddle | Insert | Sound effect |
| 3 | Rin crouches under an awning, drying it | Medium | None |
| 4 | The address in familiar handwriting | Close-up | None |
| 5 | Rin's shocked face | Close-up | Short line |
| 6 | Rin running through the rain | Wide, low angle | None |
| 7 | The door opens: her brother holds the same letter | Medium, large panel | Short line |
Three questions help you find the beats:
- What changes in this moment?
- What does the reader need to see to understand the change?
- Does this moment deserve its own panel, or can it share one with the next beat?
Step 3: Plan the pages
Group the beats into pages before you generate anything:
- Four to six panels per page is a comfortable starting point for a first chapter.
- Give the most important beat the largest panel. In the example, beat 7 is the payoff.
- Put the reveal after a page turn. Beats 1 to 6 can fill the first spread; beat 7 opens the next page.
- Alternate framing. Wide, medium, and close-up panels in a row read better than three medium shots.
- Leave room for text. Note where each speech bubble or caption will sit, so the art does not fill that space.
A rough sketch with boxes on paper is enough. The point is to decide panel sizes and order while changes are still free.
Step 4: Generate the storyboard in MkAnime
MkAnime offers two routes from a plot to a storyboard. Pick the one that matches the length of your story.
Route A: one storyboard sheet from a short plot
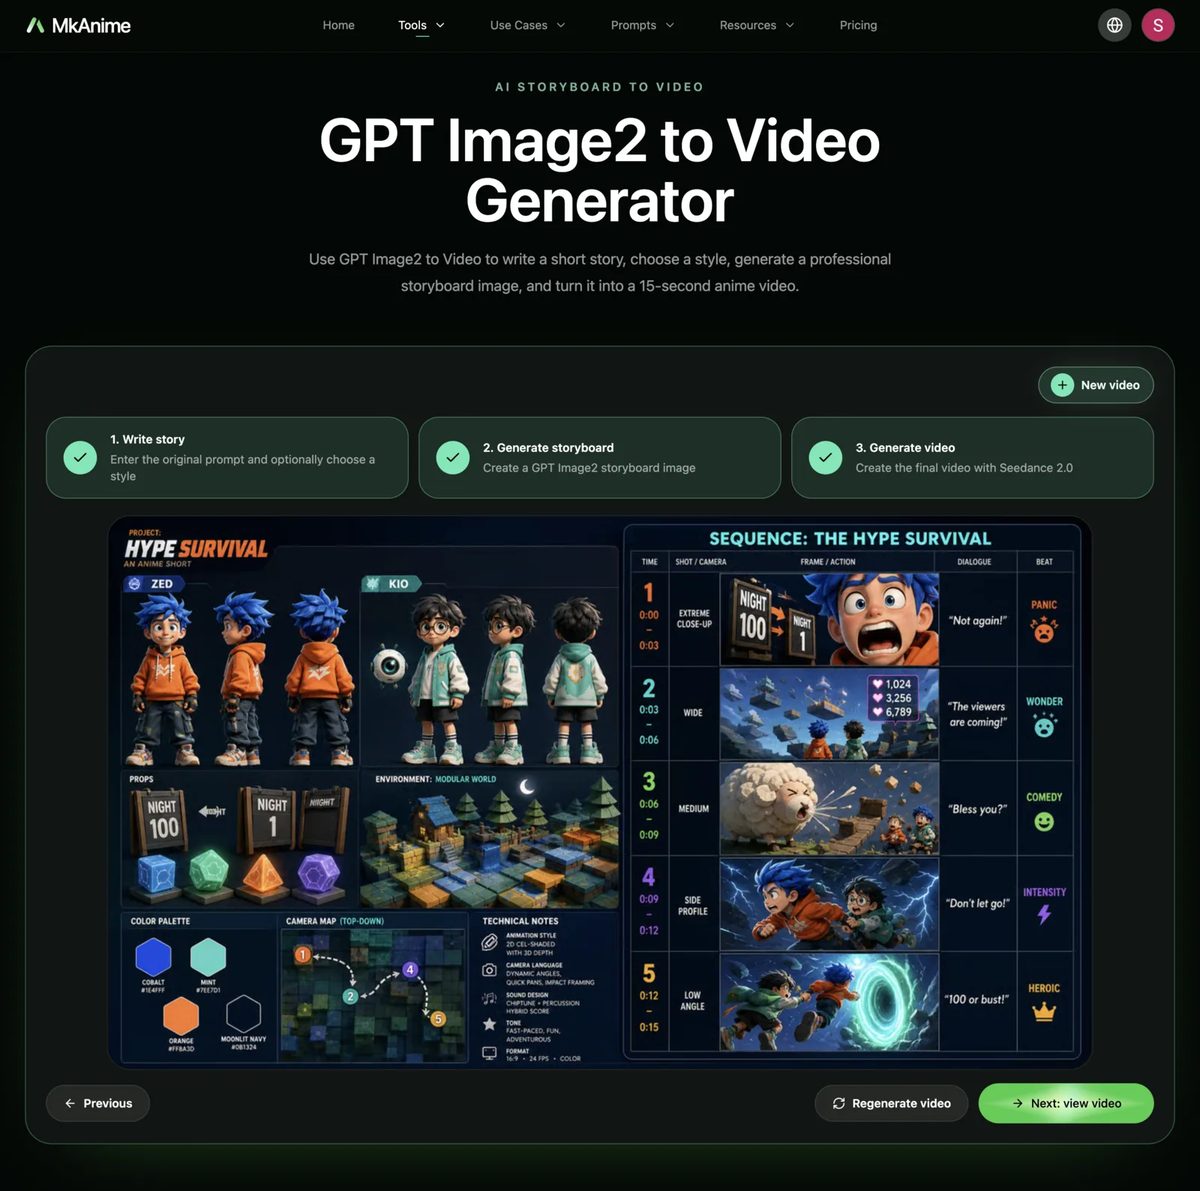
The GPT Image2 to Video generator turns a story prompt into a single storyboard sheet:
- Write the plot in the Story prompt box (between 3 and 4,000 characters).
- Choose a style. A style is required before you can generate.
- Generate the storyboard. The result is one 16:9 board with character design references, props, the environment, a color palette, a top-down camera map, and a five-shot table with framing, action, dialogue, and the emotional beat of each shot.
The video step comes after the board and is a separate button, so you can stop at the storyboard and use it as your planning sheet.
Limits of this route:
- The board always plans five shots for a 15-second clip. Use it for one scene, not a chapter.
- Text inside the image, such as dialogue and labels, can come out misspelled. Treat it as a draft and copy the lines into your own notes.
- The frame thumbnails are small. They show composition, not finished panels.
Route B: an editable shot list for a longer story
For a whole chapter, create a project. In the project settings you enter a Story Description, choose a 16:9 or 9:16 ratio, a style preset, the dialogue language, and an episode length from 30 to 120 seconds. MkAnime drafts the script, the characters, and the scenes, then builds a storyboard from them.
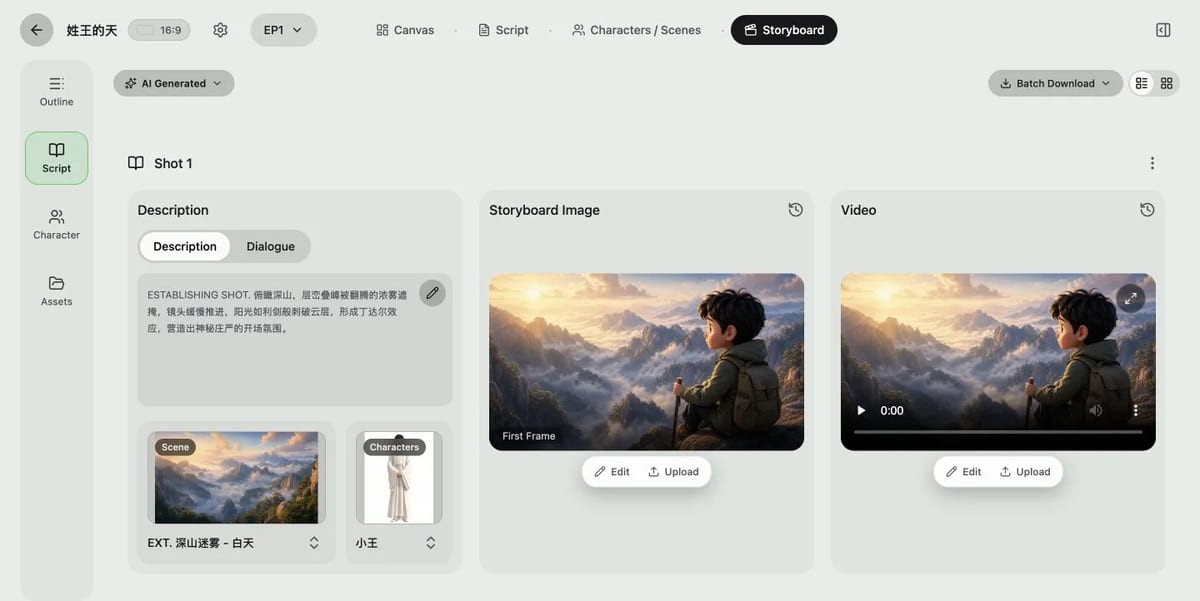
Each shot in the storyboard has:
- a description written with camera terms (wide shot, medium shot, close-up);
- dialogue lines and the character who speaks them;
- the characters and scene that appear in it;
- a storyboard image you can edit, regenerate, replace with your own upload, or pick from the shot's history.
You can duplicate, insert, move, and delete shots, switch to the grid view to read the whole sequence at once, and download all storyboard images in one ZIP.
One setting matters for manga. The default number of shots follows the project's video model, because each shot is planned as one video clip. With Seedance 2.5, for example, each shot is 30 seconds, so a 60-second episode starts with only two shots. For a manga storyboard you usually want one shot per panel, so ask the project chat for the number of shots you need, or insert and duplicate shots yourself until the list matches your panel beats.
The AI anime storyboard generator page shows this workflow in more detail.
Both routes give you shots, not finished manga pages. The storyboard images are single 16:9 or 9:16 frames, and nothing in MkAnime arranges them into a page layout or adds speech bubbles.
To get from shots to pages:
- Lay out the page yourself. Place the storyboard images in your page sketch, at the sizes you planned in Step 3, in a comic editor or any layout tool.
- Redraw panels in a manga style. Use each shot's description as a panel prompt in the AI anime image generator, pick a manga style, and add "black and white ink, screentone shading" if you want classic manga. The AI manga generator guide explains how to write panel prompts and short multi-panel pages.
- Keep your characters the same. Paste the same character description into every panel prompt. The consistent character guide goes deeper on this.
- Letter it last. Add dialogue, captions, and sound effects in your editor, where you can fix spelling and translate the page later.
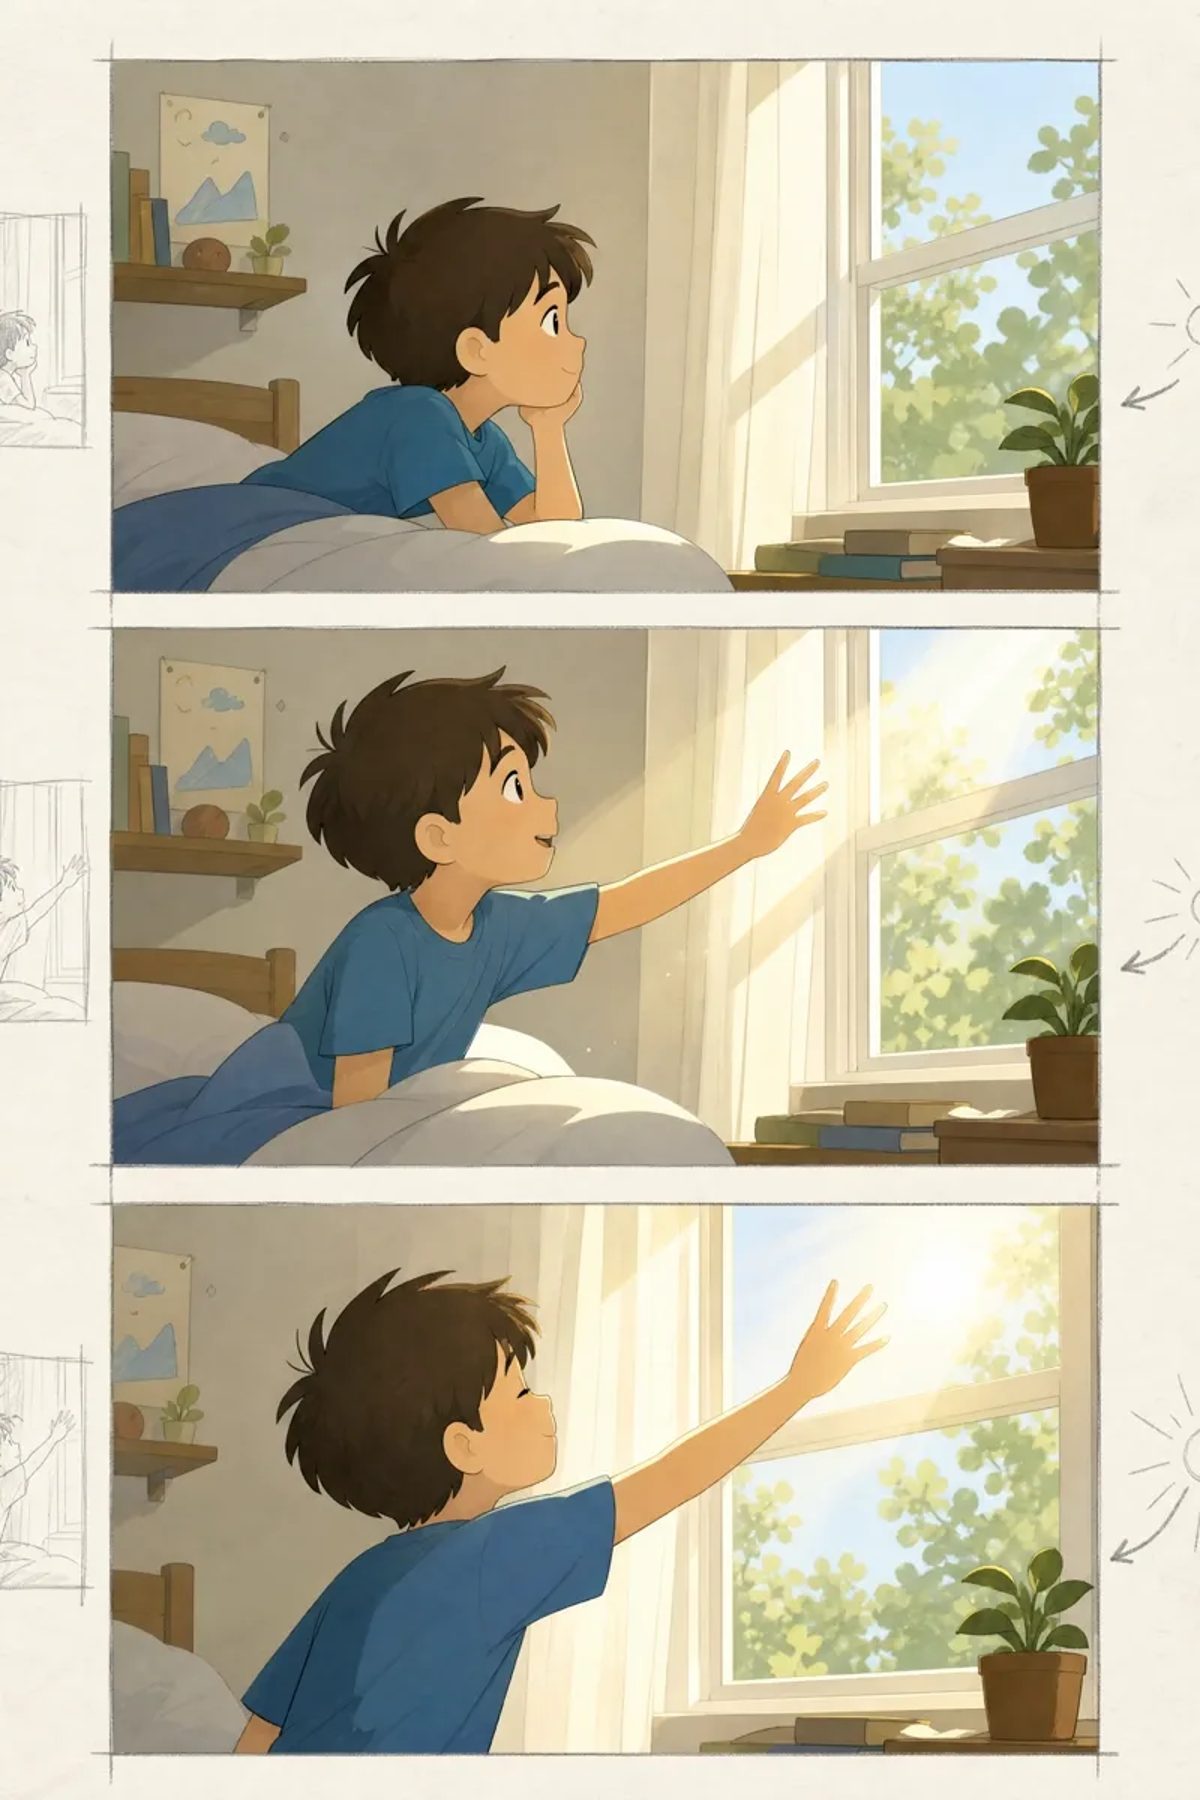
Check the storyboard before you draw
Read the shot list from start to finish as if you were the reader:
- Can someone follow the plot from the panels alone, without your synopsis?
- Does every panel change something, or do two panels repeat the same information?
- Is the biggest reveal placed after a page turn and given the largest panel?
- Do characters keep the same outfit, hair, and signature item from panel to panel?
- Is there space left for every line of dialogue?
Fix the plan first. Changing a beat on the storyboard costs a few words; changing it after the pages are drawn costs a redraw.
Use your own story
Use the generator for your own plots and characters. Do not use it to recreate pages, panels, or characters from a published manga.
Can AI make a manga storyboard from a plot?
Yes, as a draft. MkAnime can turn a plot into a list of shots with framing, action, dialogue, characters, and a rough image for each shot. Page layout, panel sizes, and lettering are still your decisions.
What is the difference between a manga storyboard and an anime storyboard?
An anime storyboard is timed in seconds and cut like a film. A manga storyboard is planned by page: panel size sets the pace, and the page turn is the strongest cut. You can start from the same shot list and plan it either way.
How many panels should a manga page have?
There is no fixed number. Four to six panels per page is a common starting point; action pages often use fewer, larger panels, and dialogue scenes can use more.
Can MkAnime lay out a full manga page automatically?
No. The storyboard tools produce single frames per shot. You arrange them on the page yourself, or you describe a short multi-panel page in the image generator and check the panel order in the result.
Is the storyboard generator free?
Generation follows the current sign-in and account credit rules. Check the live pricing page before you start.
