
Back to blog
Aug 2, 2026
Anime Character Design Tips and OC Checklist | MkAnime
Use practical anime character design tips for silhouette, color, clothing, identity anchors, and multi-angle checks before creating an original OC.
Aug 2, 2026
Use practical anime character design tips for silhouette, color, clothing, identity anchors, and multi-angle checks before creating an original OC.
Build an OC that remains recognizable through silhouette, color, clothing construction, and multiple viewing angles.
By Sonya, Contributor of MkAnime · Published August 2, 2026
Disclosure: Sonya contributes to MkAnime, whose character-design tool is described in this guide. AI assistance was used to organize and edit the article. The design examples and product statements were reviewed on August 2, 2026.
Strong anime character design communicates identity through visible decisions. Start with the character’s role, choose three recognizable anchors, create a readable silhouette, organize the color palette, construct the clothing, add one purposeful signature item, and check the design from more than one angle.
The goal is not maximum detail. The goal is a clear hierarchy that remains readable in the assets and shot sizes you plan to use.
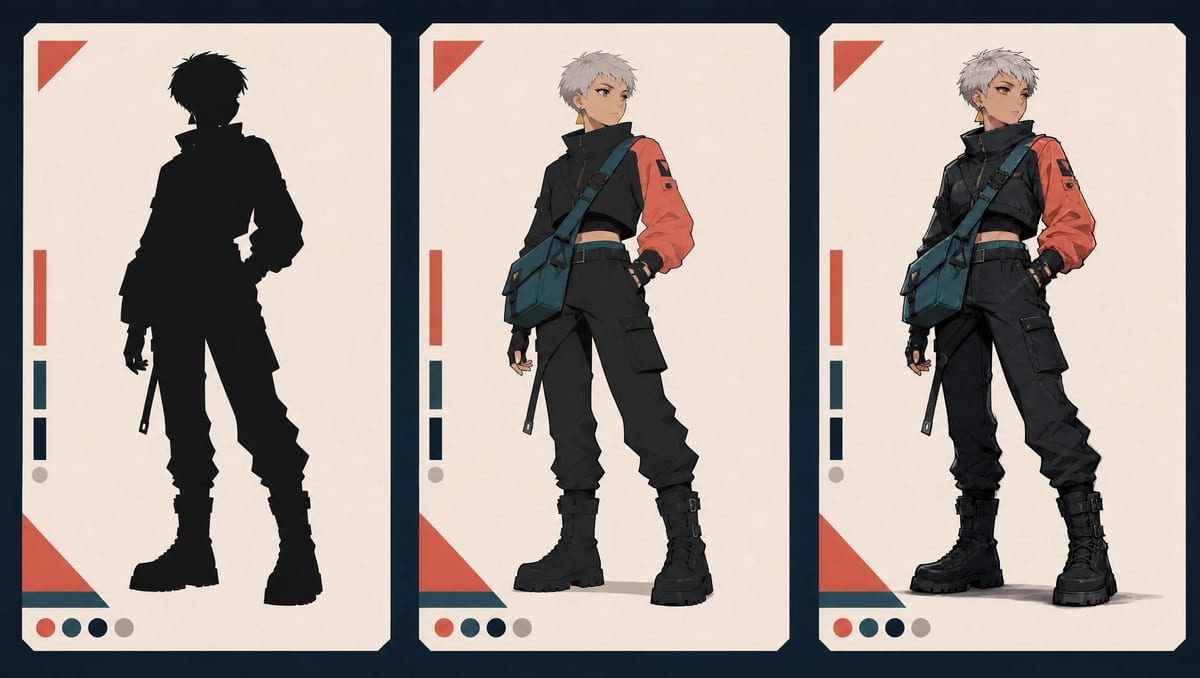
Design breakdown moving from silhouette and color hierarchy to a finished full-body character.
You do not need a complete biography before designing a character. You need enough context to make visual decisions.
Ask:
For the original character used in this guide, Mara Vale is a rooftop courier. Her role creates practical constraints:
Translate backstory into visible evidence. “Experienced” might appear as repaired equipment and efficient organization. “Impulsive” might affect posture or clothing maintenance. Keep invisible history in a separate character document.
An identity anchor is a feature you want viewers to recognize across outputs.
Choose anchors at different visual scales:
For Mara:
This hierarchy helps during revision. If a result changes, inspect the three anchors before checking every seam, highlight, and decorative mark.
Three anchors do not limit the whole design to three details. They identify the details that must carry the most recognition.
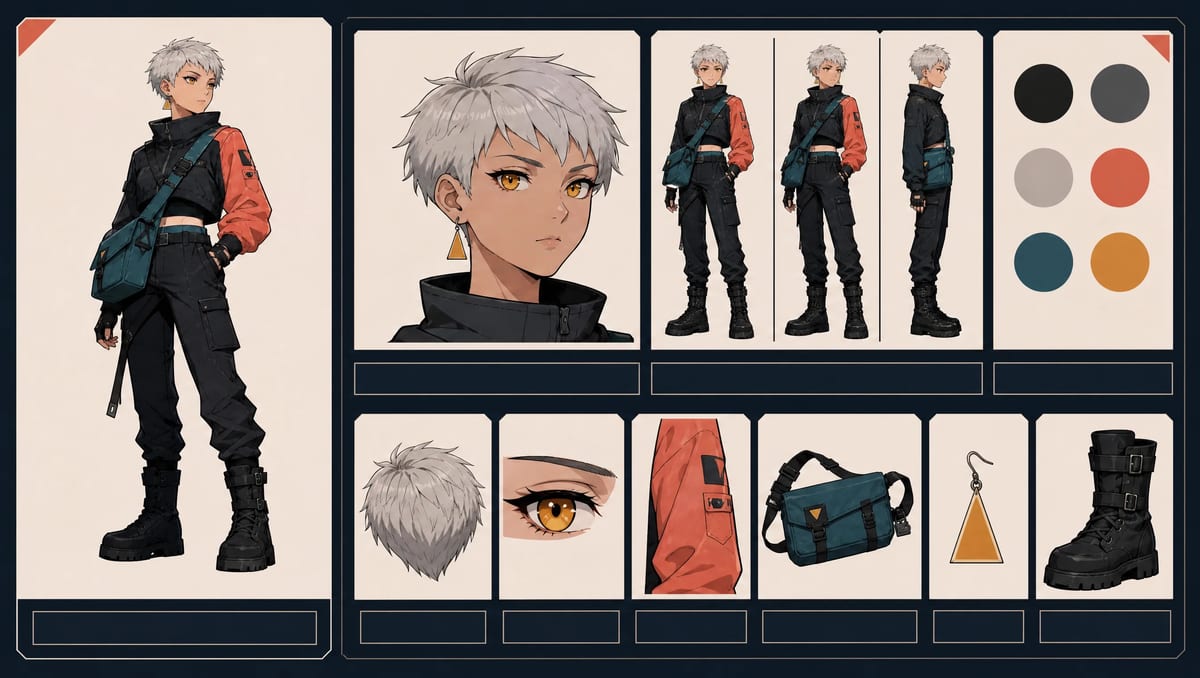
The hair silhouette, coral sleeve, and triangular earring act as three recognition anchors for the same original character.
Fill the character with solid black and reduce the image to thumbnail size.
Check:
Silhouette includes hair, posture, garment length, equipment, leg shape, and footwear. It is not a substitute for face, color, and performance. It tests whether the largest visual decisions are carrying enough information.
Mara’s early design used long hair, a scarf, a long coat, two belts, and a large parcel case. Each idea was usable by itself. Together they created several competing extensions. Shortening the hair and jacket, removing the scarf, and combining the equipment into one satchel produced a cleaner outer shape.
Repeated shapes can give a design a visual rhythm:
These are design tendencies, not fixed psychological rules.
Start with function. Then repeat selected shapes through the hair, collar, sleeves, equipment, or accessories.
For Mara, the short rectangular jacket and sturdy boots support practicality. The angled coral sleeve and triangular earring add direction. The character remains balanced because the shapes have different roles and scales.
Avoid forcing every feature into one geometry. Contrast can make a character more interesting when it supports the story.
Assign every important color a job.
| Palette role | Purpose | Mara example |
|---|---|---|
| Main | Occupies the largest area | charcoal jacket and trousers |
| Secondary | Separates equipment or a second mass | teal satchel |
| Accent | Draws attention selectively | coral left sleeve |
| Linking detail | Repeats a smaller cue | amber eyes and earring |
The exact number of colors is less important than the hierarchy. If several saturated accents occupy equal visual weight, the eye may not know where to settle.
Run two quick tests:
Color can also connect cast members. Shared uniform colors can show affiliation while unique accent placement preserves individual identity.
Describe the outfit as garments that could be assembled.
Decide:
Compare the following descriptions:
Cool futuristic courier clothes.
and:
Short charcoal weatherproof jacket ending above the hips, high folded collar, one coral left sleeve, visible front zipper, fitted dark utility trousers, heavy black ankle boots.
The second version gives an artist or generator decisions that can be checked from multiple angles.
Construction also exposes conflicts. A shoulder cape may block a cross-body strap. An oversized backpack may undermine a narrow climbing silhouette. A long split coat may collide with the intended leg movement.
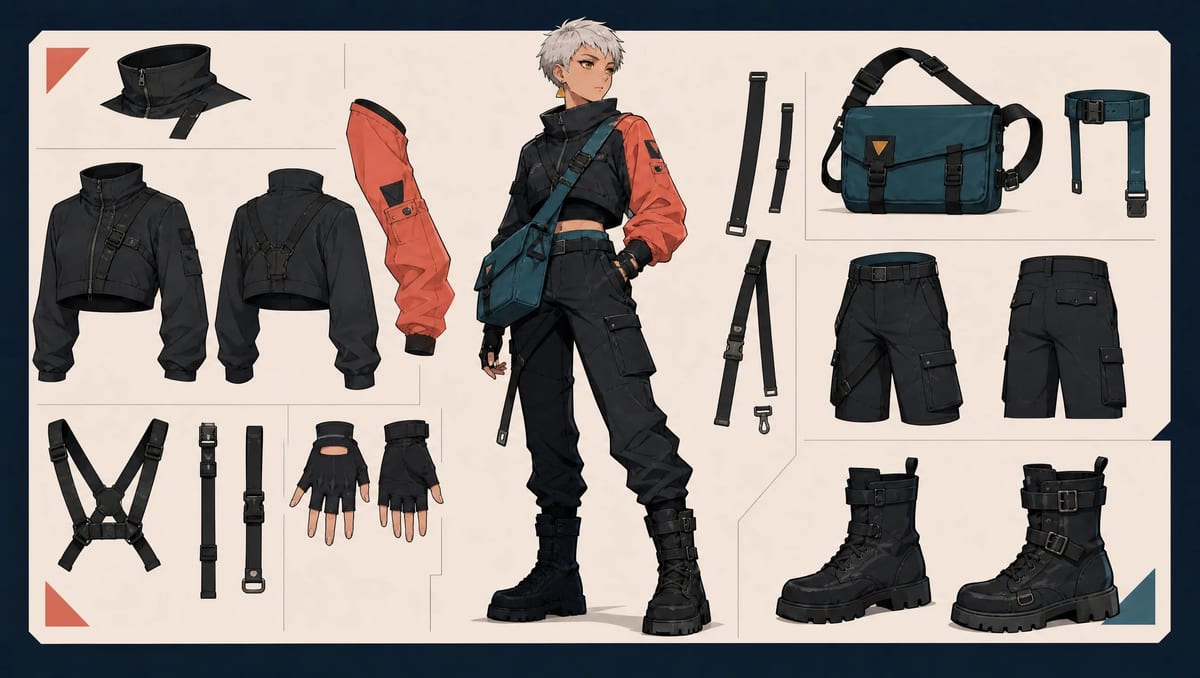
Garment-construction breakdown showing the collar, asymmetric sleeve, closure, satchel, trousers, and boots as connected design decisions.
A signature item is easier to remember when it participates in the character’s life.
Examples:
Define the item’s size, placement, attachment, and use. One meaningful item usually creates a stronger identity than several unrelated accessories.
Not every button needs lore. Give narrative weight to the details you want the audience to remember.
A front view can hide unresolved decisions:
Review at least a front, three-quarter, and side view. During exploration, these views do not need to be perfect production model sheets. They need to expose the questions the front view allowed you to ignore.
Use the anime character reference sheet guide when you need a deeper workflow for preparing and approving multi-view assets.
A character may be used as:
Each use changes which details must remain readable.
A face portrait can support subtle eye and hair details. A distant storyboard shot requires a strong silhouette and large color block. A multi-view reference benefits from readable garment construction and a restrained pose. A visual-novel cast needs distinct faces and upper-body silhouettes because the lower body may often be cropped.
Design for the actual deliverable before adding detail.
Mara’s first pass contains several possible identity cues:
The revision process ranks them.
The final design contains fewer independent details. The remaining details carry more identity.
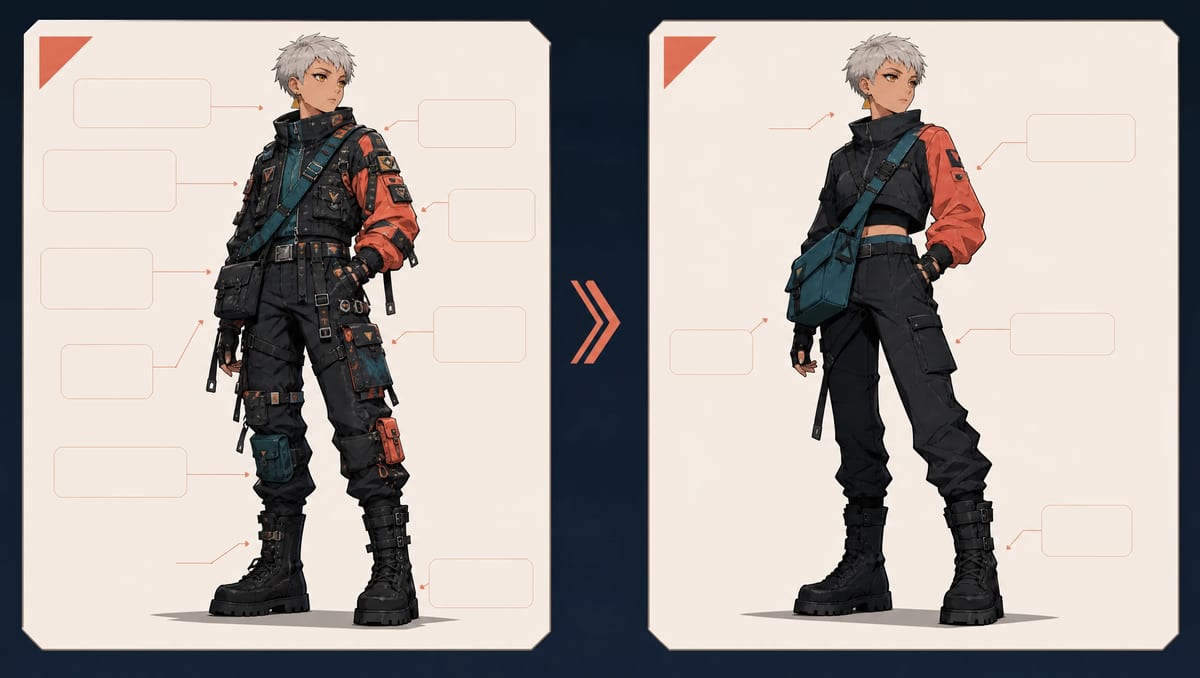
Before-and-after comparison showing how fewer competing details produce a clearer character hierarchy.
Use the anime character prompt template to convert the decisions into visible language. Keep the identity block separate from style, pose, expression, and background.
The MkAnime AI anime character creator currently provides the following workflow:
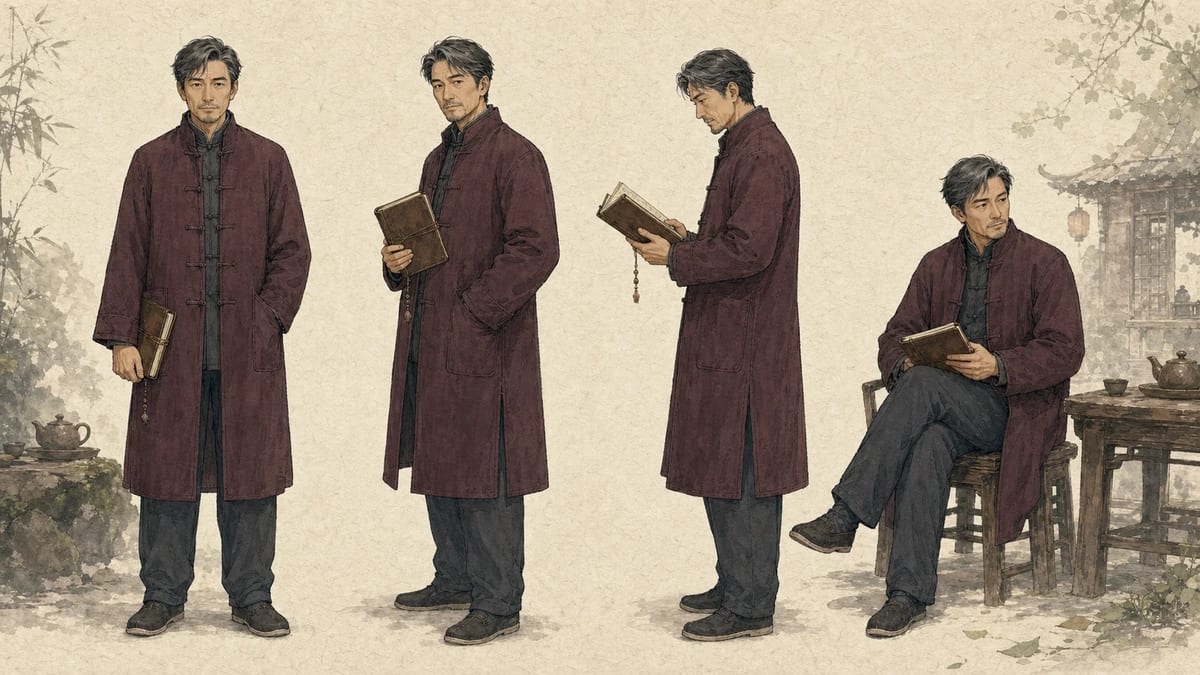
Example MkAnime character bundle with a complete full-body image and front, three-quarter, and side views.
The outputs help reveal unresolved decisions. They do not replace the design judgment described in this guide.
If you are still choosing a workflow, compare AI anime character generators for full-body designs and reference sheets against the checks above before committing to a tool.
When the same character must appear in a sequence, continue with the AI anime character consistency workflow. That later stage manages identity across shots; this page focuses on the design before production begins.
Translate role and setting into clothing, equipment, posture, wear, or movement constraints.
Protect a hierarchy. A viewer should be able to locate the primary identity cues quickly.
Check hair volume, straps, asymmetry, garment layers, props, and footwear from the side.
Choose one dominant relationship and limit the most saturated accent.
Keep permanent character features separate from watercolor, cel shading, manga ink, lighting, and texture. The different anime art styles guide shows how to change rendering direction while holding one character design stable.
Small details may disappear in distant views. Ensure that at least one large and one medium identity cue remain readable.
Start with the character’s role and environment, choose three visible identity anchors, build a readable silhouette, organize the palette, construct the clothing, add one purposeful signature item, and check the design from multiple angles.
A recognizable OC combines cues at different scales: a hair or head silhouette, an outfit shape or large color block, and one smaller signature detail. A clear hierarchy matters more than the total number of accessories.
There is no fixed count. A practical starting point is one main outfit color, one secondary color, and one limited accent, plus necessary skin, hair, and material colors. Check the value structure in grayscale.
You need enough context to make visual decisions: role, environment, daily actions, equipment, and a few priorities. A complete biography can develop after the first design pass.
Reduce the design to silhouette and major color blocks. If the identity disappears, small details are carrying too much weight. Remove or merge details that compete with the primary anchors.
Effective anime character design gives the eye a hierarchy. Translate role into visible evidence, choose three anchors, strengthen the silhouette, rank the colors, construct the outfit, and test more than the front view.
Add details that reinforce identity. Edit details that compete with it.
Sonya is a contributor to MkAnime and works on content research, product communication, and practical AI-anime production workflows.
From inspiration to complete plot, quickly output chapter structure